Thursday, September 28, 2017

Back Bedroom: Part 4 - Door, Window, Brick, Oh My!

The back bedroom project included a new back door and a new window for the bedroom. Over the course of a weekend Nick put several different stains on the door per a formula given to us by the window company to try to closely match the color of our interior mahogany trim. He also got one or two coats of polyurethane on the door, which we knew was not enough, but with a shortage of time it would have to do for the moment.

First coat.
A subsequent coat--black stain.
Oooh...
Ahhh!
Outlets were wired into the new wall, which was then insulated and drywalled. Next, the window and door were swiftly installed. I previously primed and painted the brick mold for the door and trim for the new window.


Window, outlets, drywall.
New door. New window.
A mason bricked up the void and did some needed tuck-pointing around existing bricks in the same area.

Good-bye holes under the door!
Welcome back, ol' gal!
Sure, you can tell that the area was patched, but as I write to you from the future, be assured that it will fade to more closely match the other brick. I think a black lace elderberry bush would nicely camouflage the spot  (foreshadowing). 

Sunday, September 24, 2017

Back Bedroom: Part 3 - There's a Draft in Here!

It makes me happy to have a husband who can do just about anything. But, it makes us BOTH happy when we can hire the work and finish a project quickly. We worked with a fellow who was recommended to us by the company that made our windows. Most of the work was done by one guy, but when needed, one or two additional workers would help.

First up, good-bye sliding glass door! The framing around the door was starting to rot and the door itself was broken. No tears were shed in the removal of this door.

The Insanity Box - blue ceiling and wall.
Then like magic,a new wall went in the very same day. If we were doing this project ourselves, I am not sure how many days would have gone by with a missing wall. It was too cold to find out!

Dear new wall, I love you already.
Progress!

Even before the new window and brick were put in, I already liked it better.

Thursday, September 21, 2017

Back Bedroom: Part 2 - Sourcing Bricks / Hidden Treasure

Despite the flaws in our yard, I was still compelled to spend much time and energy weeding. There may have been more weeds than grass, but I thought to myself, "If I can fill a five gallon bucket with weeds every day, one day there will be no weeds." I bought a long handled weeding tool to aid in my battle and concentrated my efforts to a small section of the yard each day. I figure that over time, I poked at least every six inches of that yard. Often, stubborn weeds would grow next to big rocks under the lawn, making it difficult to use my weeding tool. Normally I could poke from a different angle to avoid the rock and still get the weed. However, One day I kept hitting big rocks and no matter what angle I tried, I kept hitting the rock. Not known for my patience, my temper began to boil. "CLUNK! Scritch, scrape, scrape, clunk!" went my tool. Sweat beaded on my brow as I crouched for better leverage. "Scritch, scrape, scrape." I couldn't get around the rock and still be close to the weed. I stomped to the garage and returned with a trowel. This is war...no weed is going to get the best of me! I dug all around the weed until I could tell I had reached the end of the rock. Then I plunged the trowel into the ground and pried up the obstruction. A brick, then another right next to it. What an odd find! Then two more just a couple feed away, and again, and again.


Ah ha! Stepping stones! It's a little path. What fun! I pried them up and stacked them near the house. I knew we'd need bricks to replace the void once the slider was removed, but hadn't figured out yet where we'd find bricks to match the house. Later, I discovered a small brick patio around the camellia tree and happily pried up all those bricks, too. Nick found a similar brick section buried at the parking strip and as we continued to work in the yard, we found bricks lining the edge of the concrete walkway. 


Although we found a great many perfectly matching bricks buried in our yard, we still didn't have enough to cover the void once the slider was removed. We started searching for bricks on Craigslist postings and were delighted one day to find a couple about 5 miles away selling bricks from a 1927 house (ours is a 1929). It was a good match and we were delighted to have found them.


Sunday, September 17, 2017

Back Bedroom: Part 1 - Removing the Deck

We've done quite a lot of work on our own, but some items have been well worth paying professionals to assist. One of those projects was the removal of a broken sliding glass door and its rotting frame in the back bedroom. Our window rep said that he could sell us some amazing french doors for less than what it would cost to remove the door and put the house back to its original state. Wouldn't that be easier? Well, maybe...but the bedrooms are very small and having a door on that wall made the room almost unusable as a bedroom. My mind was already made up: take out the door, fame the wall, put in an awning window.


The first step in this project was to remove the deck. The deck was poorly constructed, rotting, and badly designed. The railing was unnaturally tall (perhaps a giant lived here?) and the deck was fully closed off from the stairs. As a result, the deck was only accessible via the back bedroom. Once there, a person would either have to climb over or through the railing onto the steps or go back through the house in order to access the yard. Back through the house?? Nonsense!


Nick set to work with a hammer and crowbar. Together we made quick work of removing the old deck. On another day, he worked on the project alone and while yanking hard to get a long nail out, it suddenly gave way and he went flying off the side of the steps. He landed hard on a concrete walkway and injured his shoulder. It took months for him to get back to normal, poor guy.

Once the deck and stairs were removed, water intrusion mysteries were solved. If you look closely, you'll see that entire bricks are missing from under the door and mortar eroded from some of the bricks under the slider. The back door looked as though it had never been sealed, so we pinned up some plastic as a temporary fix while we ordered a new door.


Wednesday, September 13, 2017

Angels Getting Wings

Sorry for the delay, friends. Although my blog is being told in the past tense, I should come clean and admit that we're STILL doing projects. The past couple of weekends have been filled with exhausting physical labor (a post for another day), which left me too tired to put thoughts into words.

I'd like to thank my dear ol' dad for the prompt for this little post. Dad commented on the "Enter at Your Own Risk" post that the first house of my childhood had a set of chimes housed in the hall closet. That reminded me that you might like to see the workings that go along with our new doorbell.

The doorbell chimes live in the dining room. When we bought the house, there was a Nutone bakelite chime with two long tubes (I'd guess 30" and 36", respectively). The bakelite cover had been painted over in the same color as the wall, with the same amount of care (none). It was apparently too much trouble to remove the two screws from the chime to take it down when they last painted, so they just painted over the thing. Logically, if it's too much trouble to remove two screws, it's also too much trouble to mask off the brass tubes.  This resulted in paint all along the back side of each tube. Stay with me now...it it's too much trouble to remove two screws and if it's too much trouble to mask off tubes, it's ALSO too much trouble to wipe down walls before painting. The result of that is hair embedded into the paint. Finding hair in painted walls (and chimes) is a minor step up from finding it in food, in my opinion.

Anyway, I never took a photo of the chimes on account of how disgusting they were to me. I've searched online for a match, but had difficulty finding one. It's probably super rare and worth a million dollars. We gave it to Goodwill. Anyway, this one is pretty close--so picture this, but gross. Also, the wiring had a disconnect, so it didn't work and we never got to hear it (except for our knocking the tubes manually to imagine it).

Less gross version of similar original chimes.

We're geeks for hardware, so we welcomed the excuse to upgrade. We found this antiqued brass reproduction model at Rejuvenation. When you press the doorbell, the chime says, "BING BONG!"

Mash it like you mean it.
Bing BONG!


Sunday, September 3, 2017

The Re-telling of The Missing Mailbox

In 2007, both my parents were retired and spending time at their farm home in the country that doesn't have a land line. Although they had a cell phone for emergency, it was never turned on (it was for THEIR emergency, not mine). Mom was good about telling me when they were at the farm or at the town house, but I was not good at remembering. To solve this dilemma, I created a blog site where Mom could post a Google calendar for me to keep track (there are better ways of doing this now). We used the calendar for a hot minute, but Mom discovered a great skill and interest in blogging and has been going strong ever since. A lot of people I care about follow my mom's blog, so when Nick and I bought the house, I shared some stories via the Homestead Happenings blog.
The original farmhouse - Mom and Dad's place.
To answer Mom's prompt in the comments from my last post, here is a link to the story of the Missing Mailbox. I simply could not re-tell the story in as genuine a way as it was first told. Enjoy!

Saturday, September 2, 2017

Enter at Your Own Risk

I'm taking liberties with the timeline of this renovation so that the reader is spared the agony of our somewhat sporadic approach, most usually caused by me or that old foe named Indecision. Indecision is an enemy that attacks both of the people living in this house. I'll tell you that we didn't spruce up the entry of our house all in one go, and I'll dedicate a post entirely to the front door. However, as we found these little touches, we were pleased to add them to the entry experience.

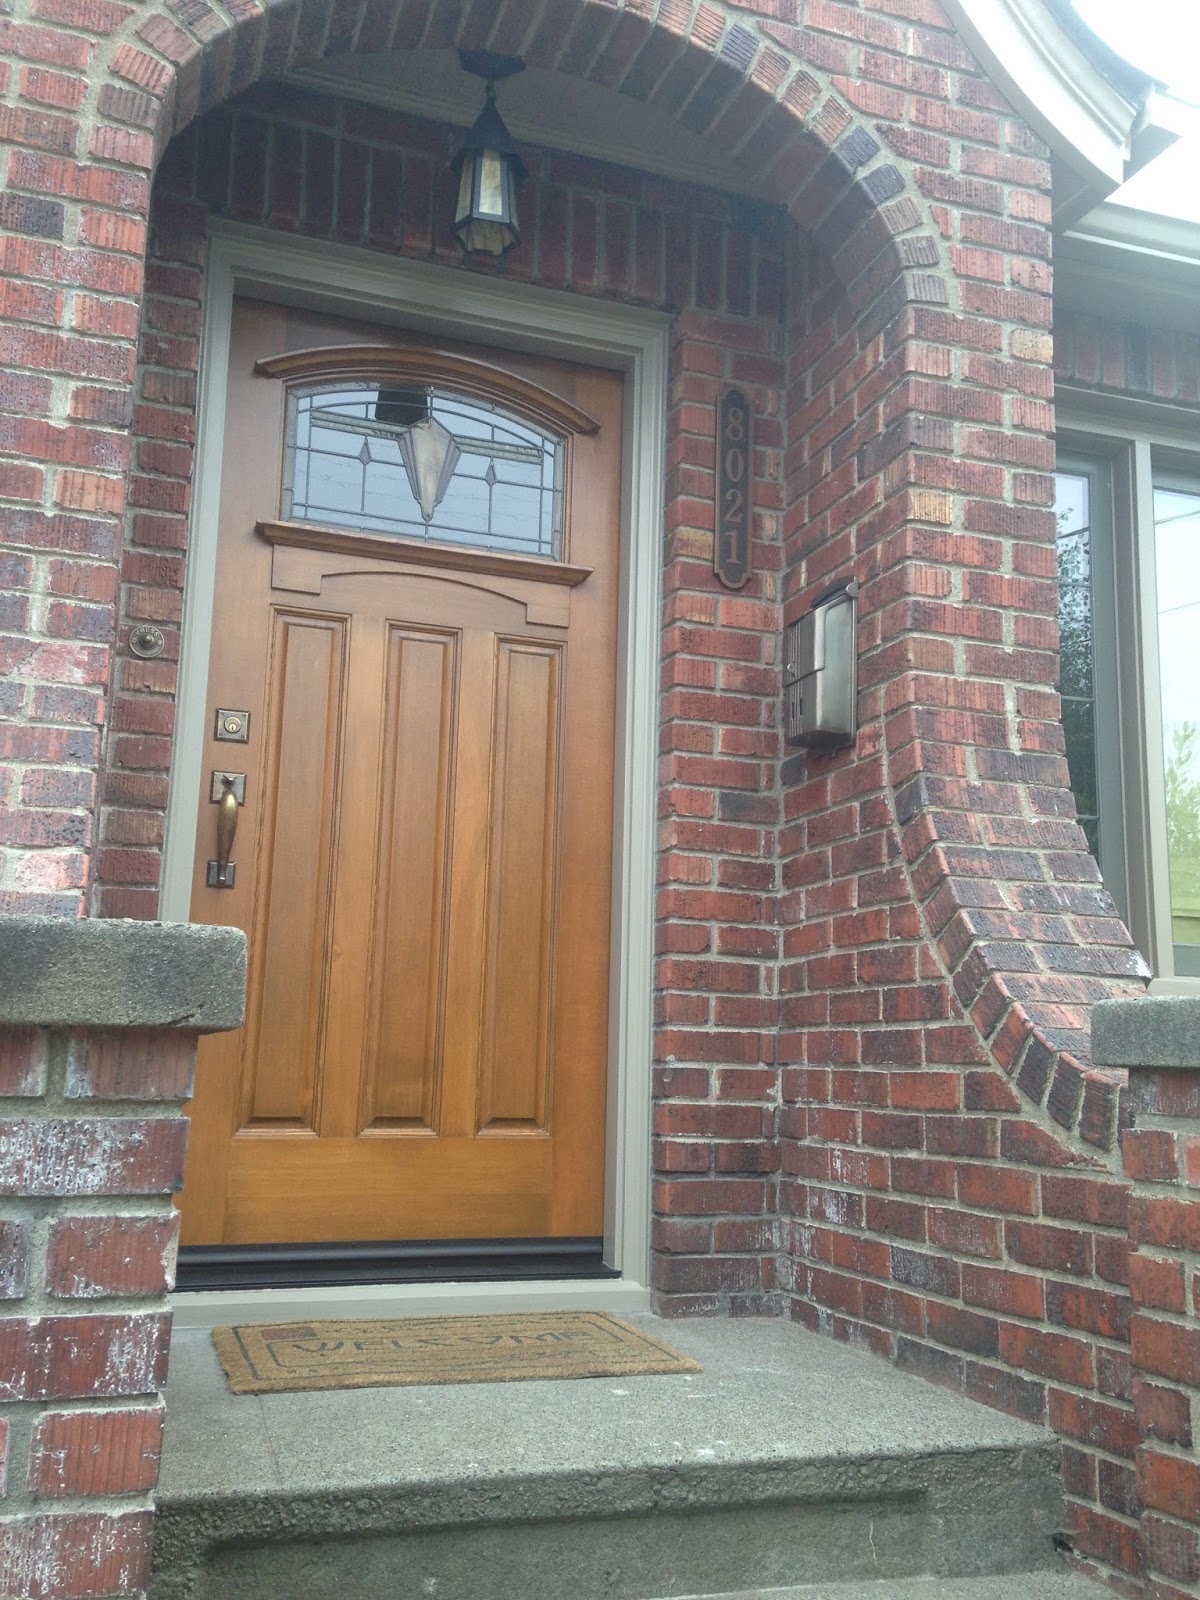
The first thing we tackled was the mailbox. Mail is an inevitability, and having a mailbox was actually an important first step to becoming residents. There was an old mailbox mounted on the lower bricks just as you begin up the steps, but it was small and rusted. It's a neat design and I considered restoring it and using it as yard art, but in the end I sold it on Craigslist, concluding that I have other projects more worthy of my time. And, that neat little mailbox deserved to be actively appreciated. We replaced it with a brass mailbox from Rejuvenation, which we mounted to the right of the front door. It's lovely and I like the sound it makes as the lid clangs shut when the mailman drops off our junk mail for the day.

Look! A paper holder...a relic of the past.
No newspaper...just junk mail.
House numbers. Looking for a house in the dark (before GPS), used to be a source of anxiety for me. I don't see well, and especially not in the dark, and so often house numbers are small, hidden, or not in a well lit location. Because of this, I had some opinions about getting new house numbers. I was met with zero resistance from my other, so ordering the new brass numbers was an easy process. The old numbers were on a placard that was probably 3" x 6" placed above the door. You really couldn't make them out even if you were standing on the stoop.
Huh? *squint squint*
Ah ha!
I've always liked those old push button doorbells. If my memory is correct, I think we had one one the first house I lived in growing up. If my memory is wrong, maybe my grandma had one. At any rate, I like them and wanted something similar. Wouldn't you know, they're not so easy to find in reproduction. We actually bought two doorbells. The first one was a discontinued model and not returnable and we got home with it only to discover that the dimensions wouldn't work for how we wanted to mount it on the brick. Not to worry, we ended up getting one that I like even better.

For sale: $20
Press it!
And finally, a front entry needs a porch light. This Rejuvenation light with the orange stained glass is so fun! I think it fits nicely with the Tudor style.

Welcome!