With the exterior work complete, the next step in the back bedroom project was to strip the trim and repair the plaster cracks. I stripped the trim with my trusty heat gun and then hand sanded. To repair the plaster, I scraped each side of the crack holding my tool at about a 45 degree angle. This gets out loose material and creates a wider ditch for the repair material. Then I primed the cracks, which seals in the sandy plaster. Once dry, the cracks receive mesh tape before a mixture of drywall mud and plaster of Paris is applied. The addition of plaster of Paris makes the mud harder than drywall mud alone and is supposed to help delay/prevent cracking again. Old plaster is prone to cracking, which is an eventuality that I've accepted, but haven't experienced yet (knock on wood).
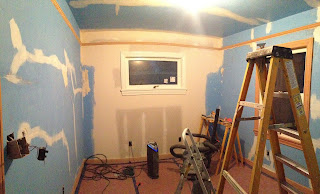 |
| Stripped and sanded trim. |
|
 |
| Repairing cracks. |
|
After crack repair, the room was primed and Nick skim coated the ceiling using a loose mix of drywall mud. We rolled the mud on with a paint roller and he combed it smooth with a "Magic Squeegee". A Magic Squeegee is a 16 inch squeegee. The magic is really just that someone thought to use the squeegee for skim coating instead of window washing. It takes a bit of practice, but worked pretty well for these two amateurs. We were later affirmed when we hired a professional to skim coat the cove ceilings in the living and dining rooms and he showed up with the same tool.
The living and dining rooms were the only areas in the house that had textured walls. Other rooms looked like they had once been wallpapered and later painted. In the back bedroom, the walls AND the ceiling had a slight texture indicative of wallpaper.
 |
| Texturing - action shot. |
|
 |
| Texturing complete. The Insanity Box is gone! |
|
We did our best to replicate the heavy knock-down texture in the living and dining rooms. We used a single crow's foot brush dipped in drywall mud and knocked it down with a trowel while still wet. The texture isn't quite as heavy as in the living and dining rooms, but I actually like it better.
 |
| A sigh of relief. This is a good place. |
The blue room was loud. As soon as all of the blue was covered, it became a quiet, peaceful place. It felt like someone found the switch and flicked it off. Sudden silence.
Stay tuned for the next installment when we choose a color!


Great job for a great couple. I love the transformation. Innovative, too.
ReplyDeleteThat mudding procedure, though a lot of work, makes for lovely walls. Yes, the transformation is wonderful. (It's such a cute little Halloween house. Christmas, too!)
ReplyDeleteYou two are real pros. Wish I had had your knowledge, expertise and energy when I worked on the farm house remodel.
ReplyDeleteTo this day you don't lack energy. And we gained expertise. Patience -- now that we could have used.
DeleteThanks for the comments! We gained our confidence about the texturing from mom and dad. I was sorry to have missed that step while I was away at OSU. We are able to learn a lot from the Internet and YouTube, but nothing is a substitute for practice. Things often take us a lot longer because we make mistakes or need to conquer our technique. For the texturing, we practiced on a section of drywall in the basement that will eventually come out.
ReplyDelete