Wednesday, March 21, 2018

Deck: Part II / Exit Through the Back Door

Despite the thumb mishap, Nick prevailed and was back at his work almost immediately. He was not without pain. It was satisfying to see the skirting and the steps take shape.

Skirting and steps.


Nick carefully planned how he wanted boards to meet at 45 degree angles on the railing tops and along the perimeter of the deck floor. The boards for the steps had to go on in a specific manner to accommodate the railing supports. These things may seem like trivial matters but they all require patience, precision, and math. I am grateful for these strengths in others.

Top of deck - finished.
The final detail of the deck is the addition of a door made out of a section of skirting so that it is hardly noticed as a door. This feature allows us to use the space under the deck for storage. It's a slightly awkward and dirty space, but it's nice for storing buckets and plastic plant pots.
Finished - nice railing!
Finished - neat little door.
I love the new deck! Greatest of thanks to my husband for his hard work, craftsmanship, and physical sacrifice.

Thursday, March 15, 2018

Deck: Part I / All Thumbs on Deck

I think a year went by that we had no access to the yard via the back door, having torn off the rotting deck during the back bedroom project. Nick and I sat at the kitchen table and brainstormed different design ideas. I drew little sketches to help us imagine the deck and once an option was selected, Nick worked out all the dimensions and an exhaustive supply list.

Possibilities. Maybe a covering over the door?
Idea: a door leading to storage under deck.
Although you don’t see me in the photos, I promise you I did more than my fair share of digging for the anchors. We dug each hole to a depth of 36” and buried cardboard tubes that we then shoveled concrete into. While the concrete was still wet, we pressed a metal post strap into the center. This hardware securely holds the deck supports above the ground so that won’t sit in water and rot. We probably have more supports than necessary, but it was important to us to have a safe, sturdy structure that would last.
Boys helping dig while I take photo.
Anchors installed. Landscape cloth and gravel laid.
The design called for skirting, which we made using lattice carefully cut to size and attached to framing. Nick pried a lattice section apart in the basement while I worked on the deck outside.

Creating the structure.
Joists.
“Hallie. I need your help,” he called. There was something in his tone that gave me a chill. I dropped what I was doing and bounded down the basement stairs two at a time. His right hand was wrapped tightly around his left thumb and he explained that he had cut himself badly. I directed him into the bathroom where we huddled around the sink as he loosened his grip. There was too much blood to determine anything except that stitches would be necessary. I gave him a rag and ran upstairs. “Don’t panic!” he shouted at me. “I’m not panicking,” I defended. “I’m HURRYING!” From the car I called the nearby urgent care and described his wound. Since we weren’t sure if he hit the tendon, they instructed us to go to the ER. It was a several hour visit, but there was no tendon damage. The doctor stitched up Nick’s thumb and we were left along without any further instruction. After 30 minutes of waiting, we wandered into the hall and discovered that a shift change had occurred and we were free to go. We were unimpressed.


Sunday, March 11, 2018

Landscaping: Rain Gardens

Rain gardens are encouraged in Seattle to help reduce the amount of water going into the sewer/storm drain system, which can become overloaded in heavy rains. A significant rebate was being offered to homeowners to have rain gardens installed by approved contractors. We wandered our neighborhood to get design ideas. Sometimes rain gardens just look like weed trenches and sometimes they meld nicely into the landscape and are hardly noticeable. Rebate eligibility is determined by adherence to a set of rules and we determined that 1) we didn't want to follow the rules and 2) it would actually be cheaper for us to do it ourselves even though we'd be passing up the rebate.

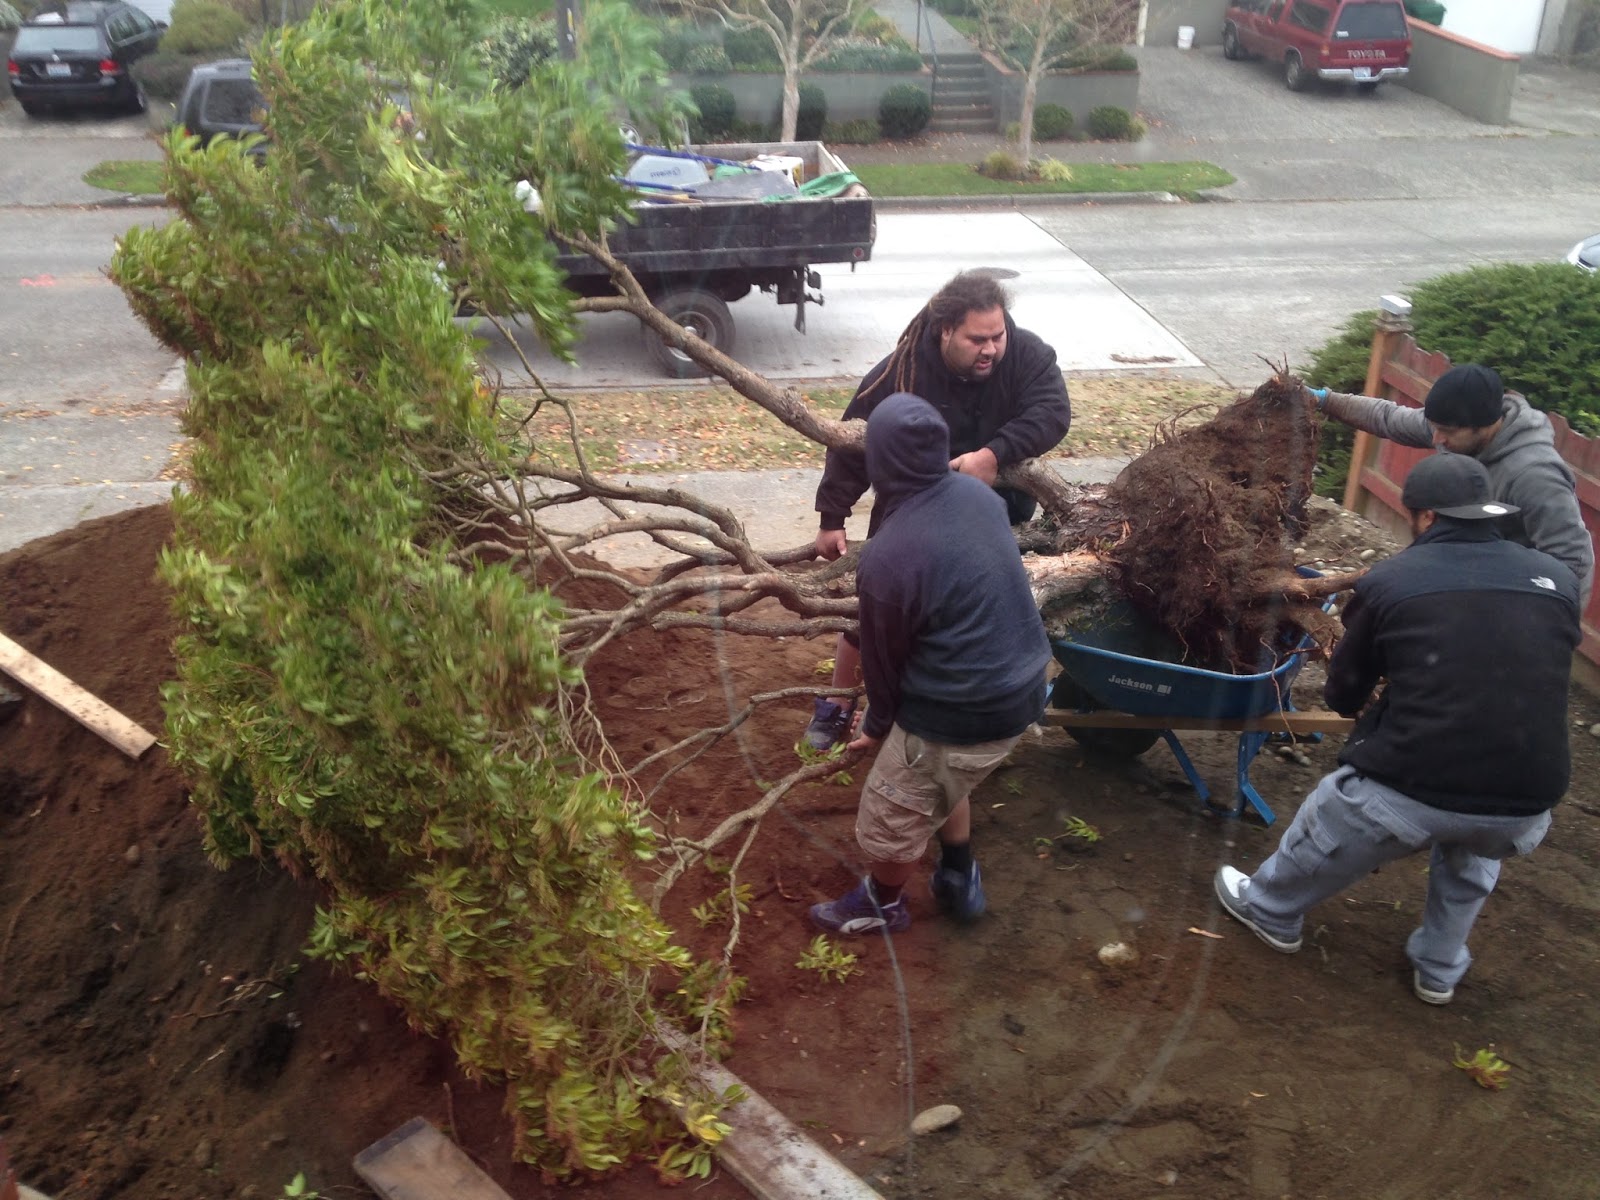
Nick calculated the necessary grade, which meant a lot of dirt movement. Our neighbor helped cut down an overgrown cherry tree that was planted on his property line and we gave a mature camellia bush/tree away to someone who showed up with an excavator to dig it up and move it. In the process, the excavator tipped and the man dislocated his shoulder. I took him to the emergency room, which was especially interesting because he didn't speak English. We were happy to not get sued.

We discovered the most effective way to tear out the lawn was by using a mattock ax and working away at it by hand. Oh, the blisters!
Grading.
Next, we dug a trench around the perimeter of the house (in the pouring rain no less) and laid irrigation pipe and catch basins under each down spout. Again, Nick figured out the precise slope so that everything would drain properly into the rain garden. We tested the drainage of our soil which provided the needed value to plug into an equation to determine the dimension of the hole needed for the rain garden. As we graded the back yard, we picked out river rock that we would then use in the rain garden. No rock was purchased in the making of this rain garden!

New rain garden.

The pieris was transplanted as a focal point of the garden, but speaking now from the future, I'm not sure the transplant will succeed. Our rain garden looked a little silly when all of the plants were small, but we've been pleased with how it's come together now that the plants have grown.

Can you see where the drain pipe is hidden?
March 2018.

Sunday, February 25, 2018

Landscaping: Front Yard

When it came to the landscaping, we sought some expert advice. We found a landscape designer who had worked on other yards in our neighborhood that we admired. She helped formulate several different design options, but the cost to have her company do the landscaping work for us was well outside of our budget. Nick and I were attracted to different landscape styles so our compromise was that the front yard would be more what he wanted and the back yard would be more what I wanted. The work began with wiping the canvas clean.

Front yard: before.

The side yard between our property and the neighbors was overgrown and the front yard contained more weeds than grass. We dug out the overgrown bushes and dug up the pieris tree to transplant in the back yard. The new design involved ripping out the original steps and curvy pathway and pouring new steps and path centered on the front window. Mom had admired the whimsy of the curvy path and I was sad to see it go, but the yard is so small that it limited our options.

Old steps.
Moving the pieris.
Thank goodness for the concrete workers who helped lift the pieris to the back yard. There is no way that we could have done it ourselves!

After the new walkway was poured, we rebuilt the retaining wall with basalt stones that we got for free off of Craigslist. The old retaining wall had been a mixture of different kinds of stones, which didn't have the look we wanted. We worked through a cold but sunny Thanksgiving day while neighbors and their family members strolled by and commented on our dedication. In my opinion, being outside and working hard was a perfect way to spend our holiday.

The design of the front yard was modeled after a traditional English garden. We envisioned a small hedge lining each section bordering the walkway. Nick calculated that we'd need one hundred boxwoods. That can't be right! He drew it out for me and explained his calculations. Sure enough. We needed one hundred. We found a wholesale nursery that would deliver big enough orders and probably saved 50 - 75% what we would have spent at a retail nursery. We then spent several weekends traveling to various nurseries to pick out other plants for the yard. I wanted a dogwood, which I dreamed would spread its branches giving both privacy and beauty (perhaps in time it will spread.)


It's been a couple years and the boxwoods have grown to where they are almost touching. Hopefully it won't be too much longer until we can trim them into a nice hedge. This year, we hope to add flower boxes under the windows. In the above photo, you'll notice the brick supports waiting to hold some pretty flowers.

Sunday, February 18, 2018

Bathroom: Finishes

Choosing a color for the bathroom was a dream compared to the living room. We went to Benjamin Moore and picked out every gray swatch they had. Then, we narrowed it down to three and I picked up sample paint. We painted the options on the wall and I declared a winner. Even as I was painting Nick was saying he wasn't sure. But paint is weird. It looks different when it dries and it looks different once you've completed the entire room. Once done, we were both confident that we liked the color. Our hope with the monotone pallet is that it will remain fairly timeless and we can change out artwork, towels, and the curtain to freshen the look.

The view from the tub.

We were pleased that there was room to install sconce lighting to the left and right of the medicine cabinet. This type of lighting is supposed to be more flattering than above the mirror lighting which puts shadows on your face (so they say). The tiled area on the floor is only 4' x 6' and must accommodate a toilet and a vanity, while still allowing a door to open. Given the limited space, we wanted a vanity rather than a pedestal so there would be room to store some toilet paper and my hair dryer and brush. There were only a few options on the market that met our requirements and I'm happy with what we got. We are still on the hunt for new towels. We wanted to get bright green towels to match the green in the watercolor paintings on the wall, but that color is apparently not en vogue for linens right now.

Our original plan was to get a curved shower curtain bar and a traditional curtain. But, we feared that a curtain would make the small bathroom feel as small as it is. Plus, if I could never deal with the constant battle of keeping a shower curtain clean I'd be a happy lady. We found a bi-fold shower door that swings in and out. When folded, we can swing it toward the wall and it doesn't hit the toilet. This is handy for when we clean the tub.

Shower door swings in...
...and out.
When closed, the shower door spans about two-thirds the length of the tub. This works out just fine because we have a rain shower head, which directs the water straight down. We had a sad hiccup with this shower setup. We really wanted a thermostatic shower valve, which is supposed to be amazing. I don't know exactly why it's amazing because I've never experienced it, but it is said to keep your water at the exact temperature you want without having to run for a moment to get up to temp. We were told by our sales consultant that we could eliminate the need for one of the knobs by using the diverter knob as the on/off knob in addition to diverting. For example: knob at neutral = water off; knob to the left = on shower, knob to the right = on tub. We executed the plumbing accordingly and then walls and tile went up. When we installed the fixtures and trim, it was discovered that the diverter knob does not have an off setting. Instead, the water is a continuum of on, either at the shower head or tub. Nick called the fixture showroom and they refunded money and gave us a new part for free. It was difficult to fix, but with some creative tile cutting, we were able to make the change without ripping out the tile.
Tile cut like a storm trooper to enable switching valves.

This delayed the use of our otherwise finished bathroom for an additional two months. It would have been infuriating if I had been accustomed to using our main bathroom or if we only had a single bathroom. What would we have done?


Before.
After.
It was difficult to get a perfect comparison photo with the door on, but hopefully you can use your imagination to piece it together. It's done!!

Tuesday, February 13, 2018

Bathroom: Walls and Tile

Hello, friends! In real time, Nick and I are both starting new jobs this month and had an exceptionally busy week as we finished out our old jobs before going on vacation to Kauai. We're back--shocked at the effectiveness of SPF 50 and our lack of tans, but fully used to sleeping 10 - 12 hours each night. Let us pick up where the story left off...

Having successfully installed the tub, the work turned to hired help. An electrician came in and ran all the wiring for the vanity sconces, a light above the shower and the ceiling fan. He was done in a matter of hours and the electrical inspector was there by afternoon to give approval. The next day, a drywaller came in and very quickly put in the ceiling and walls. I promise you, he came around 7am and was practically finished by the time I left for work an hour later. He came back the next day to sand his seams and do touch-up after it dried, and once that was done we were cleared to install trim and paint.

Walls installed. 
The red wall is the cement board for wet areas.
We decided to have a radiant heated floor, which would be the only source of warmth in the room (you'll remember that we removed the heat register). To do this, the tile guy set wiring into mortar. I believe he mixed the set too thick because it dried with mounds rather than settling out level. When I asked about it, the worker assured me that he would level it out as he laid the floor tile. Hmmm.....you can guess what happened there. Despite the imperfection, I seem to be the only person who notices that the floor is not perfectly level all around.


We're really pleased with the tile work. The touches of black really pop and I love love love the shower cubby! Compare to the old floor HERE.

Sunday, January 28, 2018

Bathroom: Tub Installation

With the plumbing complete and inspection approved, we laid down two sheets of new plywood and screwed them into place. Next was the tub installation, which we planned to do ourselves. We purchased an American Standard porcelain-enameled steel tub. The neat thing about this tub is that it's lighter than cast iron (by a LOT), but more rigid than a fiberglass tub. The enameled finish provides a similar look and feel to a cast iron tub.

After: installed tub.
To install the tub, a 2 x 4 is screwed into the studs of the wall horizontally. This ledger board is what the back of the tub rests upon once installed. It took us two hours of fiddling to get the ledger board installed just right. With a bit of research, we determined that we should lay a bed of mortar, which would prevent the tub from flexing and give a more solid feel. This approach reduces the slightly hollow feel/sound you experience when getting in and out of the tub. Seemed easy enough. The last video we watched before gathering our courage stressed that we should not get the mortar too wet. It was after 9pm when we setup the wheelbarrow and mixed the mortar in the garage. Nick mixed the mortar and then filled 5 gallon buckets that we hauled upstairs and dumped on the plywood sub-floor. The quick set mortar gets hot as it dries and again we found ourselves dripping with sweat. Nick quickly squeezed a thick bead of silicone on top of the ledger board and we worked together to lift the tub and bring it straight down on the mortar. This is a one shot deal. You can't move the tub around too much or you'll create air space and ruin the perfect bed underneath. As soon as we set the tub on the mortar it was apparent that we had made a grave mistake. The mortar was too dry!

We lifted the tub back off the mortar and Nick walked away. I could almost see visible steam coming out of his ears. "What do we do?!" I panicked. Nick was too upset to even respond. The quick set mortar was QUICKLY setting. It's very heavy and I knew that if we didn't get the mortar up quickly it would be impossibly stuck to the floor and very difficult to rectify. I ran to the basement and grabbed the flat bottom shovel. I chipped away at the side of the mound and got the shovel underneath. I pried at the sides and broke off manageable chunks. They were almost too hot to handle, so I propped the big pieces against the wall. We scraped the drying silicone off the lip of the tub and off the ledger board. For all that work, I could have sat on the floor and cried. We showered and went to bed. The next evening we tried again using good ol' slow setting mortar and a wetter mix. Everything went as planned.