Monday, May 16, 2022

The Kitchen: Part II - Demolition

My dear Uncle Chuck has been asking for an update on our house projects for quite some time, and writing a blog post just hasn't made it to the top of my list. I guess we've just been too busy DOING for me to get down to writing. Well, here's an update. In the spring of 2020, just as the world was sent home from work to hide from the coronavirus, Nick and I were in the midst of planning a PROPER kitchen remodel.
Over the long Memorial Day weekend, we gladly tore out those cabinets that I had striped, sanded, and repainted. We pulled up the floating cork floor and ripped out the lathe and plaster. 


We carried all of the debris out the back door and around to the front of the house using 5 gallon buckets. Since our house is up several steps from the street, if we had used a wheel barrow, we would have had to navigate those steps and then use a ramp to get it into the truck. The buckets solution was actually easier, in my opinion. It took something like four thousand trips (I don't really know how many) from the kitchen to the work truck and I definitely made more trips than Nick because he was using his muscle on some of the more difficult demolition inside.


Sunday, July 1, 2018

The Samsung Repair Woman

Our washer trouble began at the end of April. It stopped mid-cycle and did not fully drain. I figured the drain line was clogged, so I manually drained what was in the drum and started peeking under the unit to see how to access the pump.


Nick questioned my logic and said that the display panel showed a "tE error". We then looked to the manual and learned that a tE error occurs when the thermistor is faulty. So, I ordered a thermistor and waited several days. It's a very simple part and all you have to do to replace it is remove the back panel and take out one screw and unplug the existing part. After swiftly making the swap I plugged in the machine and turned it on. I ran a short cycle to test and after a few minutes the machine stopped and gave the tE code. Oh no! So, I drained it AGAIN. The manual explained that if it's not the thermistor then it's probably the main control board. So, I went to the Sears Parts website and ordered a control board and waited a week.
Thermistor
Main Control Board
The control board was a more involved fix only because there are several things to unplug and plug, but it's right at the back of the machine and easy to access. Once done, I held my breath and ran another test cycle. Again, the dreaded tE error came up. NOOOO! I was completely dejected. I decided to give up and call a real repair man. I found one who had good reviews that reported how he simply explained to people what part they needed to buy and how to fix the machine. What a great guy! When I called him, I explained what steps I had already taken and he abruptly said, "You've worked on the machine already? I won't touch it." Wait. What? I hung up and messaged Nick. "YOU call the repair man. I don't want to deal with these guys." I very much believe that he was short with me because I'm female.

Exterior panels removed.
Nick set an appointment with a repair man who came out and declared that he does three or four of these fixes a week and that it's always the thermistor (note: his estimate for this 20 minute fix was $390). He confirmed that the original control board was fine and that our replacement thermistor was likely bad. He otherwise could not figure out what was wrong with the machine and didn't charge us for his time. I returned the control board and ordered yet another thermistor, which did NOT fix the problem. I found just one hint on a message board. A man going through the same issues - replacing parts multiple times. He finally decided to order a new wiring harness and redo all the wiring in the machine, which solved the problem. *sigh* That sounds hard. But, if fixing a simple thermistor is almost $400, I could spend a lot of time buying and returning parts and schlepping laundry to the coin-op laundromat before I've spent $400 or more. So, I bought the $60 wiring harness and followed along with a YouTube video on how to disassemble the machine. I had done it all before except for removing the front panel, which must be done in a certain order.

I started at one end of the harness and numbered both the plug and connection on the machine so that I wouldn't forget or get confused. I then threaded the harness through the machine and each time I unplugged the old, I plugged in the new. It was sometimes difficult to reach certain areas, but it actually wasn't technically challenging. I stopped mid-project for dinner and then set back in to finish my work at 9:30pm. It took me an hour and a half to get everything plugged in and the panels replaced. At 11:00pm, I went to bed, leaving testing for the morning. I just needed one night of hope.

First thing in the morning, I ran a short test cycle and it worked! Too afraid to declare success, I put a load of laundry in and continued to keep a close eye on the machine. No errors. It really worked! A great, heavy weight has lifted and I have reclaimed my house from the terrible dirty laundry monster.


Friday, May 18, 2018

Gate: Stay IN

It took us some time to get to a place where we thought we could get a dog. There's the responsibility, long work days, home projects, an unsuitable vehicle, and incomplete fencing on the yard. Over the past few years, many of those concerns were scratched off the list, really just leaving ONE gate needing constructing. So, we got the dog and the gate surfaced to the top of the priority list.

Nick likes to out-build any possible competitor, with little concern for complexity. We thought it would be neat to have a window/look-through of some sort in the gate. Ideas included using a vintage speakeasy door or iron bars salvaged from a railing. In this situation, a simple idea beat out the others. Nick used leftover lattice from the deck to create a semi-private window in the door. We left off at the end of March with the gate constructed, but without the arbor at the top. I wonder if neighbors and passers-by thought that the piece of scrap wood at the top was part of the finished design. It's just a brace to ensure the posts stayed plumb while installing the other parts.

It's not done, but it still looks good.

Several weeks passed before Nick could finish the gate project. He got a bad cold and then we had a rash of rainy weekends. Recently, the weather cooperated and Nick was able to finish.

In-progress.

Above, the nicely detailed horizontal board has been placed, as well as some shorter boards just under (perpendicular). 

NOW it's done!
Such detail...ooh la laa!
The finished gate and arbor is glorious. Nick notched out each one of the top boards, which adds dimension to the design. 


Friday, May 11, 2018

Yard Stuff: A Sunny Sunday OR Experiments

When it comes to gardening, I can mostly do what I want. If I keep it in a pot, Nick doesn’t care at all. He also doesn’t care if I weed, prune, or fertilize. However, he DOES care when it comes to putting things in the ground, though I still take gambles on small things that won’t be hard to take out later.
Sky pencil holly, laurel, bush tree, maple.
This is my little nursery with last year’s experiments. Sometimes when I find seedlings I’ll put them in little pots to see if I can grow them bigger. Here I have some laurels that I plan to take to Mom and Dad’s farm to plant. They may not make it given the climate difference, but there’s no cost to trying. They’re looking a little yellow, so it’s time to get them in the ground and feed them. At front is a little bush tree that I think came from the neighbor’s yard and is growing well. The pathetic looking thing on the left is a sky pencil holly from the front yard that I’ve put into PICU (Plant Intensive Care Unit), to see if I can revive it. I also have a maple that got fried last year when I was away for a few days. Its leaves shriveled and fell off, but it stayed alive!
Unidentified thing (left) and sweet gum tree (right).
This year’s experiments include a cutting from one of the sweet gum trees at the parking strip. This twig was growing from the base of the trunk, so I snipped it, dunked it in rooting hormone and stuck it in a little pot. Its leaves came out and are getting bigger! I moved him to an area of the yard that is a bit more protected so that he doesn’t stress from the direct sun.

Rosemary cuttings staged in a warm place.
These rosemary clippings were gathered from a nearby source. I hope they take root so I can plant them in a hot spot next to the deck. It’d be great to have fresh rosemary for cooking!

New hose and water soluble fertilizer.
This pieris breaks my heart. How do I make her happy?
The sky pencil hollies in the front yard have not been happy. I’m taking a bolder approach this year and if they don’t snap to, we need to do something else. I got some water soluble miracle grow and plan to feed them every 7 – 14 days, as suggested on the bag. The pieris that we transplanted from the front yard has had a rough go. Nick says it lost a lot of root mass in the move and he’s amazed it’s survived at all. This year we were heartened to see quite a lot of healthy new growth.

Saturday, May 5, 2018

Yard Stuff: A Sunny Saturday

Recently, a request from a VIP reader came in wondering what we were up to in the yard (real time). On nice days, I typically do some weeding after work in the yard. I can never keep up! We've been shorted on sunshine the last two or three weekends, but today we finally got lucky. It was a perfect day to spend outside.

Evil Bluebells have taken over our side yard. These are especially hard to eradicate because you have to dig deep to get underneath them and grab the bulb. Even the gentlest tug on the top part will separate the leaves from the bulb. It's very frustrating, but today I was up to the task!

Side yard: before.
Side yard: after. What should I put here?
Last fall we purchased a bunch of thyme to plant in the joints of the stone patio. The thyme isn't very happy there and isn't taking off. We had extra in reserve for the walkway that we haven't finished yet. The poor things were suffering in their little containers, so I planted them around this maple tree. Nick doesn't like it, but I think they'll do well there and I doubt he'll get the gumption to change it.

Do you have the thyme?
I bought four watering bags to put around our trees. These Worplesdon Sweet Gum trees in the parking strip have hardly grown in the last two (maybe three) years. I gave them some fertilizer intended for rhododendrons and azaleas, because they are supposed to also like slightly acidic soil. It's hard to keep them watered because they are out of reach of the automatic sprinkler that we set up in the summer, so I thought these drip bags might make them happy.


Watering bags at street. Stupid grass isn't doing well there.

We have a dwarf rhododendron in each bed on either side of the walkway. This is the first year this little guy bloomed! His friend on the other side still hasn't bloomed, but maybe it will like the fertilizer I put near it. The dogwood was very happy with the fertilizer and the watering bag. He (she?) didn't bloom last year, which made us sad. I think things would be improved with a fresh load of compost to put everywhere. 
Dwarf rhododendron. So pretty when it blooms!
Blooming dogwood. Get bigger!

Saturday, April 28, 2018

Bathroom Accessory: Towel Bar

Not so long ago, I showed off our finished bathroom. One of the challenges with such a small bathroom is how to store the things we use every day. The medicine cabinet holds toothbrushes, lotion, perfume/cologne, hair product and eye care. The sink cabinet houses my hairbrush and dryer, toilet paper, and not much else! We installed a little shelf above the toilet so that we have a place for cotton balls and swabs. We probably could have fit those in the cabinet, but the little shelf also gives us a place for the hand towel. Where would it have gone otherwise? We originally considered a light that would go over the mirror and a hand towel bar that would go on the wall to the left. When we decided to do this shelf, it meant that we had room for the more desirable sconce lighting. Yay!
Sconce light.
Shelf with hand towel bar.

Towel storage was a real challenge. There really wasn't any wall room left for a towel bar. Plus, there are two of us using this bathroom, so we wanted to accommodate at least TWO towels. And what will we do when we have guests? We first installed this double towel hook on the wall behind the door. It's suitable because 1) it can be reached from the shower, 2) it is small and fits on the wall behind the door, and 3) it can accommodate two towels. We knew this wouldn't be our final solution because towels don't dry as well on a hook. We thought the perfect solution would be a hotel rack that we'd install in the shower alcove. However, we couldn't find one that would accommodate two towels.
Double towel hook (at right in photo).
Double towel bar (at left).


In the end, we went with this double towel bar that comes from the same line as the sconce lights and the double towel hook. I love it! It's working out really nicely and the towels are drying quickly. This leaves the hook on the wall free for guests.


Saturday, April 21, 2018

Patio: A Place to Relax

Fall came quickly after we finished the deck. We began dreaming of our patio before realizing that there just wasn’t time. Although September in Seattle is typically a mild month in terms of weather, the days get noticeably shorter and the evening air starts to bite. We were tired, anyway. So, the next year we set our eyes on the patio! We had a good idea of the materials we liked and where to get the best price, so it only took a quick refresh of our memory to finalize our purchase. Unfortunately, it was a several week delay for the granite we wanted. Not to worry! The amount of excavating and back-filling with gravel took every bit of the three week delay.

Excavating.
Screeding sand for pavers.
The materials were delivered in pallets by a big truck with a fancy machine attached to the back. Our good friends offered to help us carry the materials from the driveway to the back yard. We were so grateful for their help, especially on the big granite pieces!

Weird machine.
Materials.
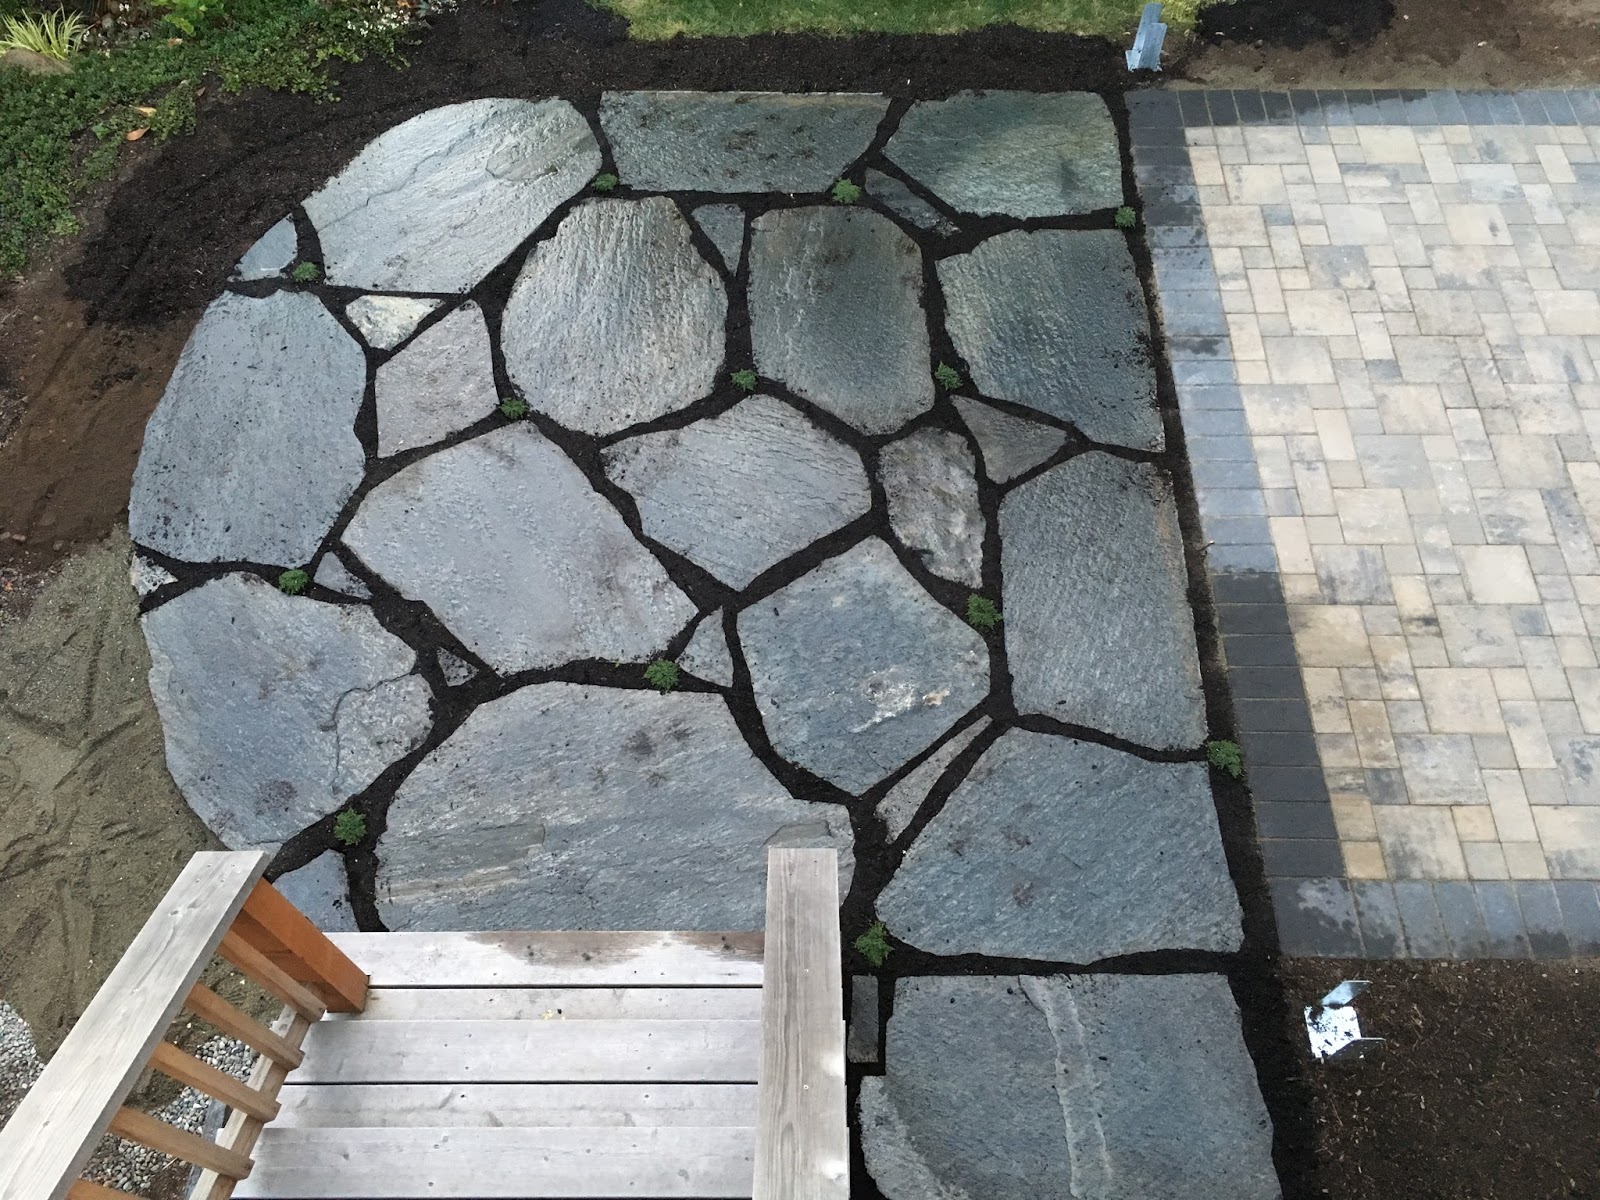
Laying the paver patio was relatively easy. You’ll notice that we dug holes and poured concrete footings for our future pergola. The hard part was laying out the big granite pieces and fitting them together just right. We didn’t want to cut the stone, preferring a more natural look. That said, we still wanted to minimize the gaps between stones. We lifted, turned, flipped, lifted, moved, turned, and lifted. I am famous at our house for ending a weekend by saying, “I’m so tired. I’ve never been this tired before.” On this day, when I laid down for a short rest on the work site and feel asleep, it might actually have been true.

Figuring...requires lots of staring.
Will this work?
Man kills wife in epic patio project.
A miracle!
I never could have imagined that we’d be able to put the puzzle together, but Nick figured it out! I love the way the patio curves at the left. We just happened to have all the right pieces and a guy who could see how it would go together.