Saturday, August 26, 2017

Refreshing the Railing: Curly Gets Cut Loose

The more exterior painting we did, the more the green railing at the entry bothered me. So, one day without discussing my plans with Nick, I started stripping the paint. The banister was difficult to strip. I'm not sure what sort of paint was used, but it was thick and didn't bubble with the use of the heat gun. I used a 60 grit sandpaper with our rotary sander on the flat surfaces and then switched to emery cloth. The twisted bars were especially difficult, but I had some success using a Dremel.

The railing had some odd little curly details that didn't seem to match in proportion or style. It's possible that they were added on at a later time. Nick decided that they should be removed and he set to work cutting them off.
Good-bye, Curly!

Although you may not see me in most of my photos, I assure you that I am an equal participant in these efforts! Nick helped with the burden of stripping the metal, which I, and my sore little fingers were grateful. I masked off the area and created a make-shift painting booth with a plastic drop cloth and Nick spray painted the railing (primer then finish coats).

Stripped.
Painted.
What an improvement! The neutral color of this railing will forgive potential changes in trim color well into the future.

Summer, The Painting Season

As it always does, spring rains gave way to summer. In Seattle, as soon as it becomes dry enough to paint, it's almost too hot to paint. We stripped and sanded the peeling paint down to the wood, which most critics say is overkill. However, the end result of this difficult labor is perfection. The first neighbor we met came over with a business card in hand offering painting services before the ink was dry on the closing papers. We declined his services, but one of his employees would sometimes stop by and chat. "Oh, you'll be working on this all summer," he postulated. Even with an extra two hours of effort after work some days during the week, he was right. It took us all summer.
Before.
Painting In-Progress.

Nick replaced a rotting board at the big peak in front, which had to be specially sourced given the difference in dimension of old lumber and new. He enlisted a mill shop to make a trim piece for the peak over the entry and then made the cuts necessary to create the curved effect (I have no idea what this technique is called, but perhaps a reader with a woodworking husband will know).
Still working...can you spot Nick?
Curved trim piece.
One of my favorite finishes is the tongue and groove board that creates the ceiling in the entry alcove.  The gross peeling paint bothered me immensely and refurbishing it was a fast and very satisfying job. I don't have a proper before photo, but imagine it looking similar to the peeling brown paint around the door frame in the below photo. I stripped the old paint with a heat gun and sanded the whole thing, including the grooves. Then, I patched the imperfections, including a piece that was deeply gouged, and Nick caulked each and every-other seam where two joined boards came together with a bit of a gap.


Sanded, patched, and caulked.
So pretty!

Monday, August 21, 2017

Windows and Cake

Windows. You see through them...they keep out the rain and wind...what else is there to know? I had a similar experience of my own ignorance when Nick said, "We're going to need to choose what color roof we want." I looked at him and said, "Roofs have different colors??!" My world is a crayola box of 16 colors as drawn by a second grader. All houses had gray roofs to me (except my mom and dad's farmhouse, which has a green tin roof and you'd have to be pretty blind not to notice). I can now see all the different colored roofs AND the different types of shingles. Along the same lines, I can also carry at least a four minute conversation in windows.
Old Windows.
These are bad!
Our goal with the house has been to modernize and restore in the spirit of its original era. The house still sported its ORIGINAL leaded single pane windows. While leaded windows can be a real novelty, these were in sad, sorry shape. They had not been maintained and the weather and sun had stripped away the protective paint causing them to sustain water damage and rot. It was so bad that some of the panes pulled away from the sash entirely.
Neat old casement stay (plated steel).
New stay - solid brass.
It was important to us to retain the leaded glass look, but we thought it wise to go with a double pane solution. What many window manufacturers offer is the leaded effect either on the inside or the outside of the window. Which would you prefer? Would you want it to look most authentic from the outside or the inside? Hmmmm....we would like to have that cake and eat it, too, please.
Ooh la laaa!
See the divider?
Luckily, we found a local custom wood window manufacturer that offered a unique solution where the leaded effect is on both the inside AND the outside. The windows also have a divider between the panes exactly where the leaded grid is applied so that the overall effect is more authentic. Without the divider between the panes, you would get a double lined effect if looking at an angle. For hardware, we thought the old casement stays were really cool, but they were plated steel, some were missing the knobby deal and they were pitted and flaking. So, we got new casement stays that make us happy, too.

Friday, August 18, 2017

A Roof Over Our Heads OR Hallie Saves the Day

As mentioned before, quickly getting a new roof on the house was a condition of our financing and we were motivated to get it done. We sought 3-4 estimates and chose the one we liked. Spring is a difficult time for roofing in Seattle because the weather is terribly unpredictable, and if you were to predict, your safest bet is rain. But, the roofer seemed optimistic, stating that they just needed a good 3 day run without rain to do the job. With spotty weather coming up, our guy said we'd be looking at the following week to start. Imagine our surprise when that Wednesday we discovered a crew on the roof tearing away shingles. They apparently finished another job early and thought they'd get started on ours. Rain was predicted for the following day. We were assured that everything would be fine--they'd tarp the roof and pick back up when it stopped raining.
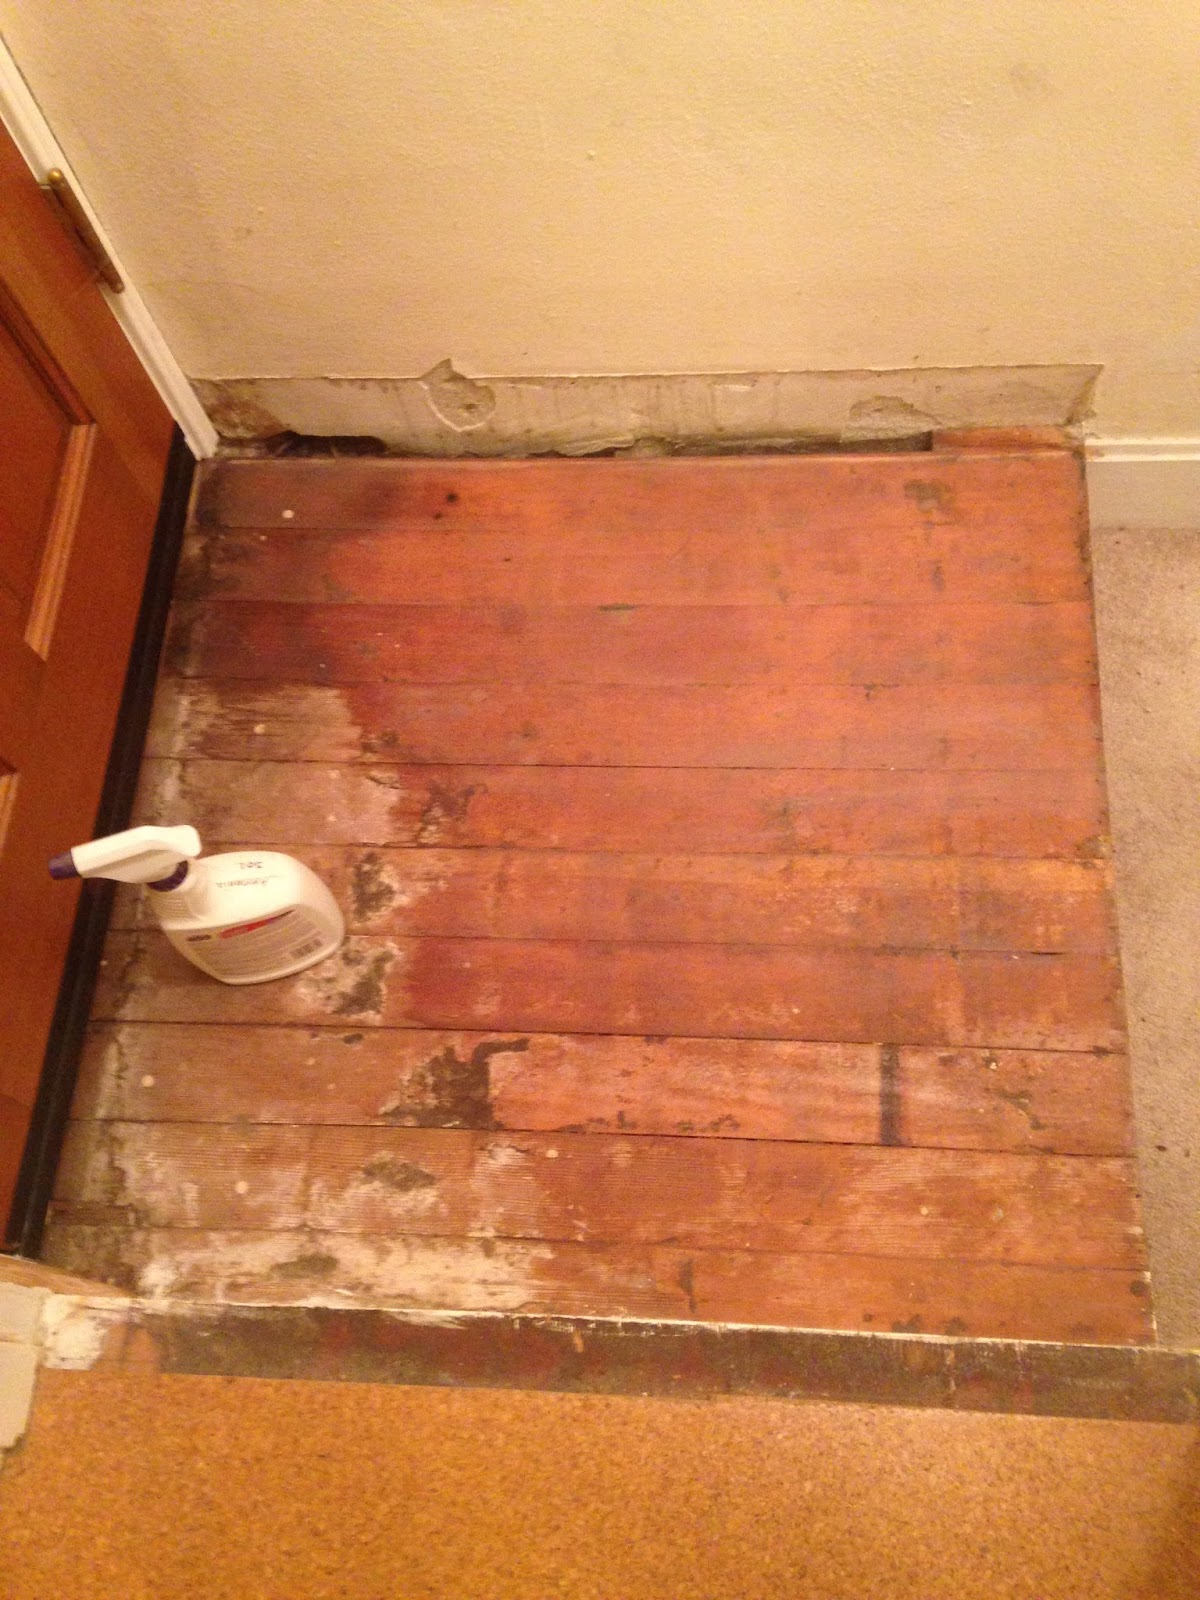
Roof destruction.


That weekend, the volume of rain in Seattle broke records. The entire month of March was the wettest in recorded history. We planned to spend the weekend at the house to prepare for our move. Just before bedtime on Friday, we jumped over a river of water at the curb and ran to the dark entry. Nick fumbled to get the key in the door. "We HAVE to get the porch light fixed," I complained. A firm shoulder to the door and we were in. Nick quickly noticed a leak in the living room and called the roofer, while I emailed the roofer from my iPad. We hoisted ourselves through the small hole in the front bedroom to access the attic. "The tarp isn't tight at the corner of the house, Nick observed."

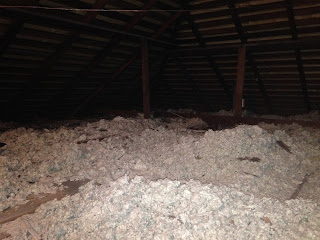
Cellulose insulation.

I stayed in the attic and wallowed in panic. Nick grabbed the only ladder we had--a 6 foot fold-out style and went outside. Standing on the very top of the ladder, he stretched to reach the end of the tarp to pull it back into place. It helped some, but water still splashed in. I grabbed a 5 gallon bucket and attempted to position it. With the sloping roof, the bucket was too tall to be effective at the corner. I slumped in disappointment. The attic is filled with loose cellulose insulation, so I began digging it away from the corner of the house. *BAM* An idea struck. I ran downstairs, grabbed our tarp, and returned to my spot. I pushed the insulation around to form a little crater-like indentation. I threw the tarp over it and pushed the center down into the indentation. Nick popped his head up through the attic access.
"What are you doing?" he asked.
"I'm fixing it."
"That's not going to work." he judged.
"Yes it will...I'm a genius!" I proclaimed. "You can thank me later."

Our first night.
We went to sleep in our sleeping bags on the floor in the basement and hoped for the best.

In the morning, the rain subsided and I climbed into the attic to view my handy work. A puddle of water had pooled on the tarp and everything else was dry. I beamed at Nick.
"Now what are you going to do, genius?"

I grabbed a paper coffee cup from the trash and scooped the water off of the tarp and into my bucket one cup at a time. I had collected at least a gallon and a half, and if you ask me, saved the day.

Tuesday, August 15, 2017

Little Fixes

Bear with me on the timeline. There were a lot of little things that we took care of while also working on the kitchen. Early on, we had our vents cleaned and furnace serviced so that we could run the heat. The house was so cold and there was so much moisture in the air that the doors had swollen and were difficult to open and close. I remember opening the front door by throwing my shoulder into it like I was a lady copper (police woman) in an action film trying to break it down. We ran the furnace 24 x 7 during the weeks leading up to our move. I had dreams about our new house burning down before we even lived there, but I was told that the furnace needed to run in order to heat the house and dry it out.

My assessment was that the vents had never been cleaned (remember--85 year old house). Yuck!
Let's not breathe this.

The chimney needed to be tuck pointed and rebuilt at the top, so we scheduled that work right away before the re-roofing. There had been a big, ugly antennae attached to the chimney, which I posted on Craigslist as scrap metal. The person who picked it up sent me a photo of the antennae precariously attached to his small car as he hauled it off in the early morning hours. He was excited to use it as an antennae. Ha! It hadn't occurred to me to post it for its actual use.

Chimney work.
Scrap metal or...an antennae!
This outlet at the back door gave me concern, so I called an electrician to have it fixed. It was apparently not rated for an exterior application, so the electrician replaced it entirely and nicely mounted it to the brick.

Who needs an extension cord?
Oddly satisfying little improvement.

Sunday, August 13, 2017

Finished! The Kitchen Reveal

Some of the final touches on the kitchen included installing new outlets and switches. Nick did a lovely job of putting these in.


We bought cork flooring for something like $300. What a steal! It went in quickly and was perhaps more satisfying than painting.
I discovered that when we updated our address, we received a big envelope of coupons. Foolish people might toss these before looking at them, but I flipped through each one. Both Home Depot and Lowes had coupons for 20% off up to a certain dollar limit. We used one of these coupons on our new refrigerator and range. There was a slight hiccup in this process--the range came off the delivery truck dented. They offered us an additional 10% off if we wanted to keep the dented appliance, but since it would be on the visible side, we decided to send it back for another.

For most of the things I do, Nick has been quality control. This means that he inspects my work and often completely re-does it. You're right--that can be very frustrating. This arrangement was problematic for the kitchen cupboards because he wouldn't allow me to paint them, citing that he still had work to do. Eventually he finished the lower doors, but time marched on and I guess we've decided that we're okay with the open shelf look for the uppers. So, here you go...a finished kitchen!

Saturday, August 12, 2017

Final Stages: Painting the Kitchen

My favorite part of a restoration project is the painting. Stripping away the old paint and dirt and then sanding is therapeutic in its own way, but painting comes with instant gratification. It quickly transforms a room from a dull, sad place to a bright, cheery one. I love that! We learned a lot while working on the kitchen in terms of technique, and for that I'm glad we started in this room. We hope to do a true remodel at some point, so mistakes are forgivable here.

Lessons:
  • Use a heat gun for stripping paint.
  • ZAR latex wood filler is best for surface imperfections.
  • Plastic Wood is best for deep gouges (dries very hard).
  • Shellac primer is expensive but is the very best for sealing in odors. Just do it. Buy a throw-away brush, cover everything well because it's very soupy and will drip. It's smelly at first but gasses off quickly.
  • Brush paint cabinets but move quickly to avoid leaving actual brush strokes. Watch for drips. If you miss any, suck it up and do some light sanding before moving to the next coat.

Priming
I wish I had primed all surfaces of the drawers.
We switched out the old hardware for new, including the cupboard door hinges. This was a bit of a pain because the new hinges were slightly thicker than the old, so in order for them to work properly I had to make the mortise a bit deeper. The old hardware was a bronze-looking steel. The new hardware is chrome plated brass. 

Old hardware.
New hardware.
I wanted a yellow kitchen and Nick allowed it. I loved this buttery yellow when we picked it out, but to my disappointment, I found that the color changed a bit  with the addition of the new light. I think we had a CFC bulb for awhile (I DESPISE those), and the blueness of the light with the yellow walls resulted in a "greenish" cast. It's an easy fix, but we let that bulb burn out before we actually changed it. Obviously, you want to pick your paint in the exact lighting that you'll have in the room, but the challenge was that we wanted to paint the ceiling before adding the new light fixture and I had already charged forward with my paint selection. I still like yellow for the kitchen, but in the future I might go for a slightly lighter hue.

Nick cuts in; Hallie rolls.
I love the schoolhouse light. *Heart*

Wednesday, August 9, 2017

Sweat the Small Stuff OR A Post About Nick

I won't let you experience in real time exactly how long each project took. You've heard the saying that painting is 90% preparation? Well, we put so much effort into preparation that we're more like 99.9%. Nick says that when you paint over a flaw, the flaw actually becomes MORE noticeable. I'm not sure that's true when you're me, but it's probably true when you're him.

Nick dug in and helped with a lot of the sanding of the cabinets, plaster repair (mudding and more sanding).

Good progress!
Heat duct.
Repair work in-progress.
Sanding! That's actually a black shirt.

He took out all the old, mucked up outlets and replaced them with new (reveal of the new coming up soon!)

Hmmm....
Really? Nice hole.
Cleaning. Learn about it.

Monday, August 7, 2017

Floors through the Ages

Using chemical stripper is a messy, detestable task. I can now tell you that I prefer using a heat gun for this purpose. The stripper gives you the initial feeling that it's faster than the heat gun, but cleanup is a challenge, and once the wood is dry again, it doesn't sand well. The heat gun causes the paint to bubble up and any remaining traces are crispy and sand very easily. It's probably a tie on the time commitment, so go with the easier experience (heat gun).

Some would say that stripping the cabinets is overkill; that you only need to do a cursory sanding and then repaint. The people that say such things apparently don't know us.

Messy paint stripper.


When the day came to tear out the old floor, I was eager to see what was underneath. We could tell that the floor had been built up about 3/4". When the top layer came off, it revealed a yellow-green vinyl, circa 1978 (best guess). Beneath that, an interesting brown-green linoleum pattern. I love to imagine what the kitchen looked like when it was new, and this was the missing piece to the visual in my mind.

Someone once loved this.
Linoleum from c. 1930.
As a contrast to how easily the top layer of floating floor came up, the linoleum had been installed with tar. The tar wouldn't scrape off or sand off, so we began looking for a different solution. I had hoped that maybe denatured alcohol or mineral spirits might do the trick. In the end, the only thing that seemed to help at all was the expensive chemical stripper. Mostly, we just wanted to get enough of the tar up so that we had a reasonably level surface for the new floor.

Tar mess with paint stripper.
After cleanup. It's okay.

Fast forward a couple of years, and through the gift of a small potty accident while dog sitting, I now know the secret solution to getting tar off the floor. Ammonia! A simple diluted solution of ammonia left to soak for only about 20 seconds will pull the tar up like a dream. Doh!

Tar on floorboards.
5 minutes later - after ammonia.

Saturday, August 5, 2017

The Ghost of Kitchen Past

Guys. I couldn't do it. No amount of cleaning could make that kitchen acceptable to me. It needed a proper remodel, but for the long list of other things that had to be done, we decided to settle for a cosmetic upgrade.

The "before".

If you looked at the kitchen from far enough away, say, the moon--it wouldn't look SO bad. But upon close inspection of the cupboards and inside the drawers, it was caked in gunk. The hair stood up on my arms. "Bad things have happened here," whispered the spirits of the house.

Gross.
Do I have to touch it to take it out?
I began taking a change of clothes to work with me each day so that I could go directly to the house in the late afternoon to spend three or four hours on the kitchen. I could see my breath while working in the cold house. I wore layers of clothes and an over-sized hoodie. The heat would be turned on soon, but not until the furnace had been serviced and the ducts cleaned. Little thought went into order of operations. I tore off cupboard doors and dumped chemical stripper on whatever I could find. I traveled back in time and removed the recent white, the prior yellow, the bold red, and the original green.
Goin' wild.
So much surface area!